
# Game Controller
With the dashboard, we can control everything we need in our game. Such as Match Modes, Match Rules, Statics, User Progress. So we need to add some parameters to control how many modes we have in our game, how matches should end, how user progress should be updated, and we can create collections with statics feature to save data such as weapons, shop items, characters, and whatever we want to have in our game.
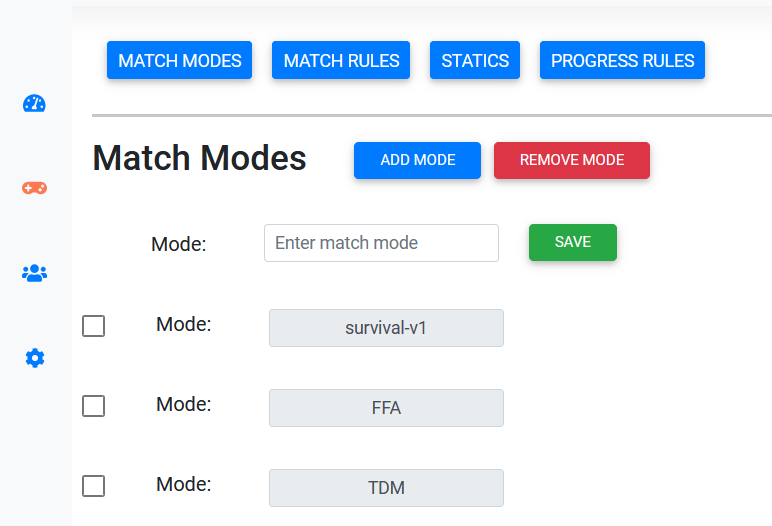
# Match Modes
We can add as many match modes as we want. We use these modes to add match rules and in matchmaking. To add a new mode click on ADD MODE and then enter the mode name and then click on the Save button. To remove the mode check that mode and then click on REMOVE MODE
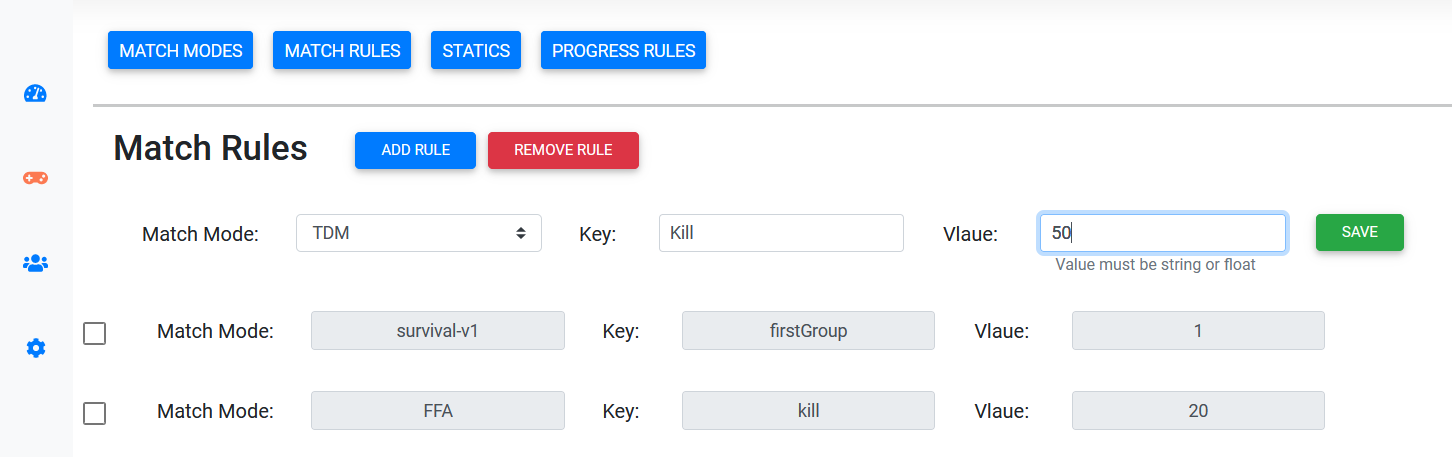
# Match Rules
We use rules to determine how matches should end in each match mode. To do that click on ADD RULE and then from match mode dropdown chose what mode you want to add a rule for it and then enter a key and value you want to match ended with that and then click on the Save button. For removing the rule check that rule and then click on REMOVE RULE
# Statics
We can have whatever we want in our game for example here we created weapons class and saved weapons and there properties that we want to have in our game
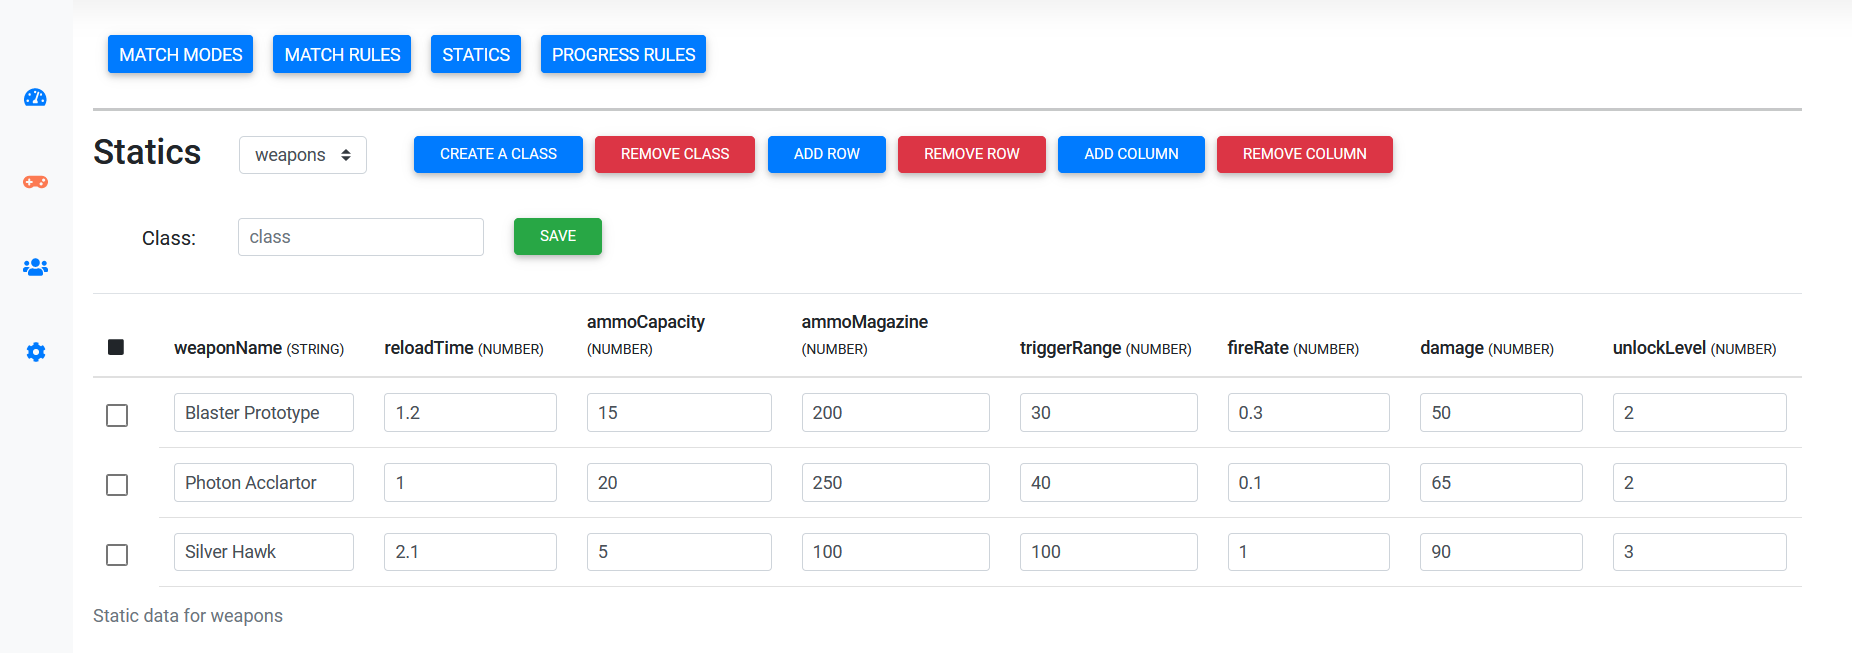
# Step 1: Create Class
First we need create a class by clicking on CREATE CLASS and then we should enter the class name we want to create and click on Save button. After adding the class we can switch between classes from dropdown.
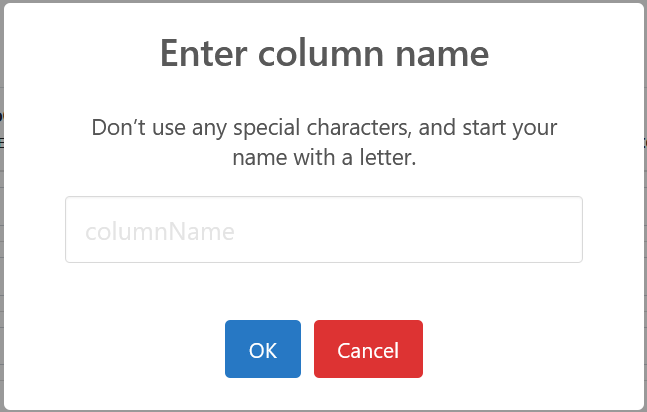
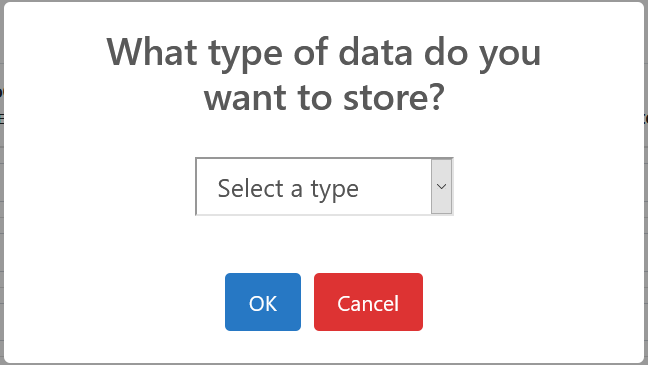
# Step 2: Create Column
After we add some classes we should add the column name to that class to save our values. For doing that click on ADD COLUMN and then enter column name and in the next step you should choose the type of that column
# Step 3: Create Row
After we add columns we can create as many rows as we want by clicking on ADD ROW for storing our data in the database.
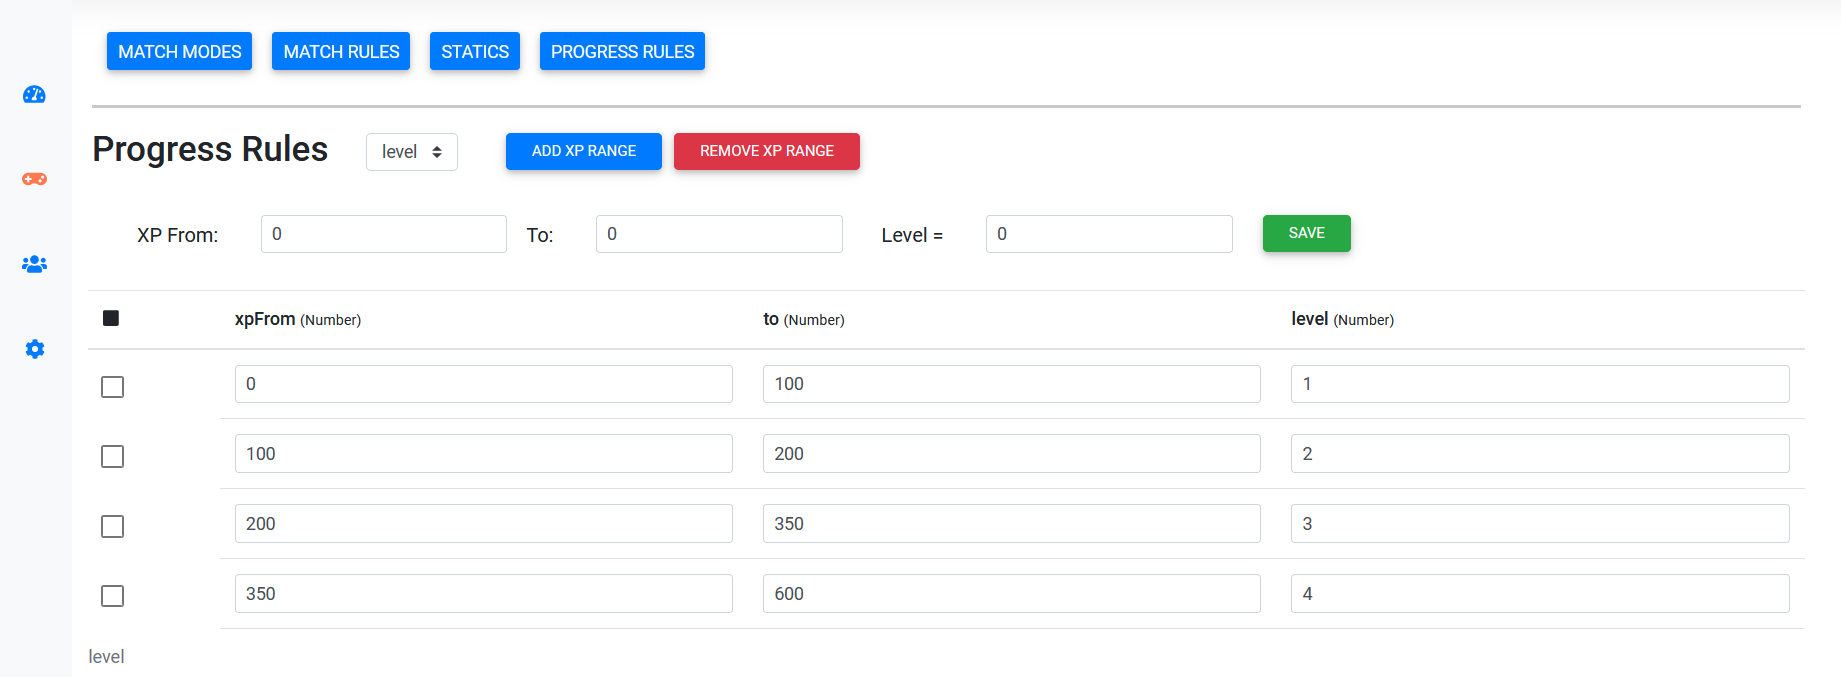
# User Progress
To determine how users should get levels and ranks we need to specify the range for them. We use XP for level up and skill for rank. For example, we specified a range between 0 and 100 for level 1 and if the user sends 20 XPs to the server, the server will return level 1 and stores that level in the database. You can switch between level and rank from the dropdown and do the same for rank. To add new xp range, click on ADD XP RANGE or for skill click on ADD SKILL RANGE. To remove the ranges check them and click on REMOVE * RANGE
WARNING
If you want to add another range, the xpFrom or skillFrom property must start from the previous value
← Analyser